Environment:
SailPoint Version : 7.0, 7.1
Problem Statement:
Unable to request a new account for existing identity from Manage Accounts in SailPoint IIQ.

Problem : Account Request Option is not available
Solution :
Firstly we need to check the Lifecycle Manager Configurations, navigate to Lifecycle Manager and in Configure tab Search for Manage Accounts options :
Applications that support account only requests : Select all applications check box or specified application according to your requirement.

Solution part 1- Select all applications
Allow Manage Accounts Additional Account Requests : Enable
Allow Manage Existing Accounts : Enable
Allow Account Only Requests : Enable
–> If you are using higher version of SailPoint 6.4 then you will face problem in finding these 3 options to enable them.
Solution 1 :
For that you need to edit init-lcm.xml and import it again in iiq console. (This will effect pre-existing workflows and LCM Configuration. So, to avoid that follow Solution 2).
Follow these steps and pictures shown below for editing init-lcm.xml (Solution 1)
Step 1: init-lcm.xml is present in ~identityIQ/WEB-INF/config/init-lcm.xml location. Make a copy of it and place it in a safe folder.
Now open init.xml and search for Manage Accounts under QuickLink tag.

In init.xml search Manage Account
Carefully observe 3 entries under Manage Accounts tag.
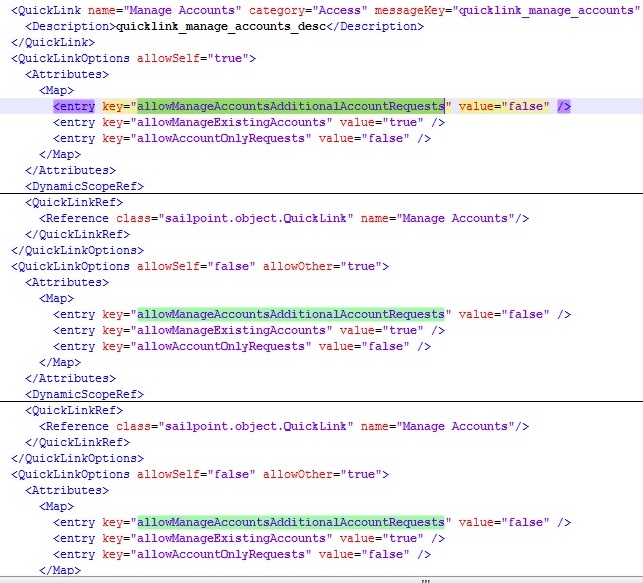
Original_init-lcm.xml of SailPoint 7.1 version
Step 2: Make few changes by enabling this options manually from false to true 3 times in Quicklink Manage Accounts tag as shown in the picture below.
<entry key=”allowManageAccountsAdditionalAccountRequests” value=”false” />
<entry key=”allowManageExistingAccounts” value=”true” />
<entry key=”allowAccountOnlyRequests” value=”false” />
After editing : <entry key=”allowManageAccountsAdditionalAccountRequests” value=”true” />
<entry key=”allowManageExistingAccounts” value=”true” />
<entry key=”allowAccountOnlyRequests” value=”true” />
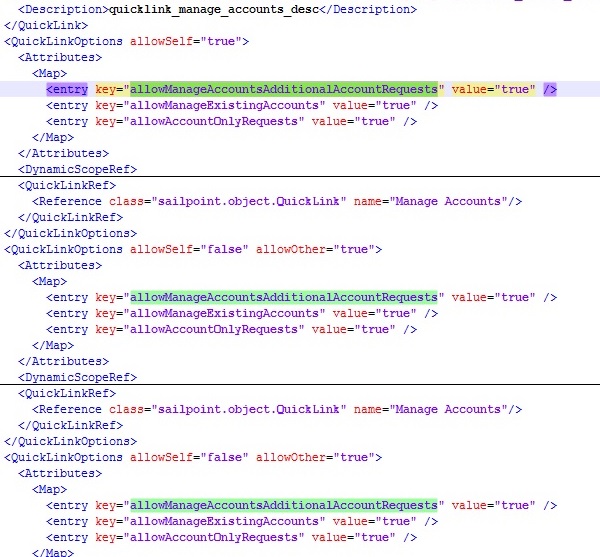
After Editing Manage Accounts Configuration
Step 3: Now save it and import it in iiq console. By using command import init-lcm.xml. After importing observe following changes.
Step 4: Request Account option is available (Issue Resolved). Choose the application for account request. Submit the form.
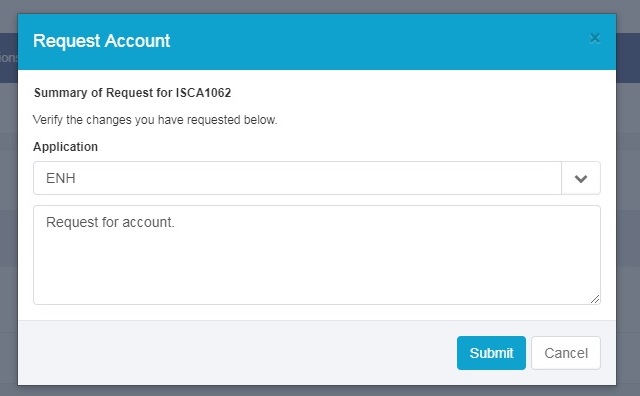
Request Option Available Now 7.1
> Just for Reference in SailPoint 7.0 it will look like this as shown in the picture below.
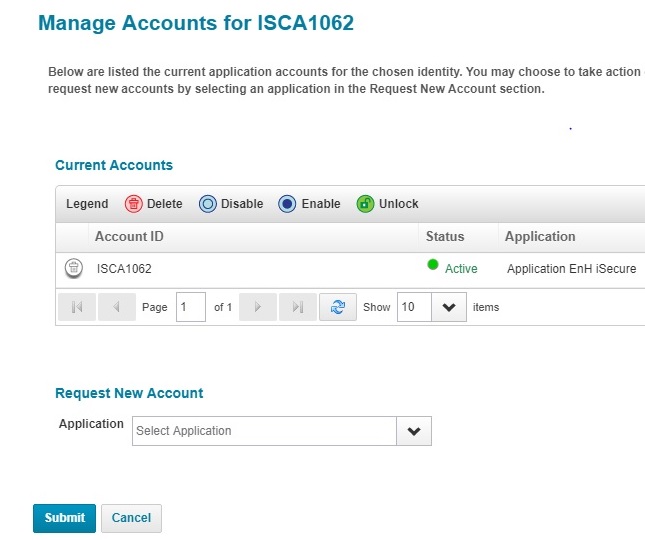
Request Option Available in SailPoint 7.0
Step 5: Confirm Account Action . Click Confirm at the end of the page.
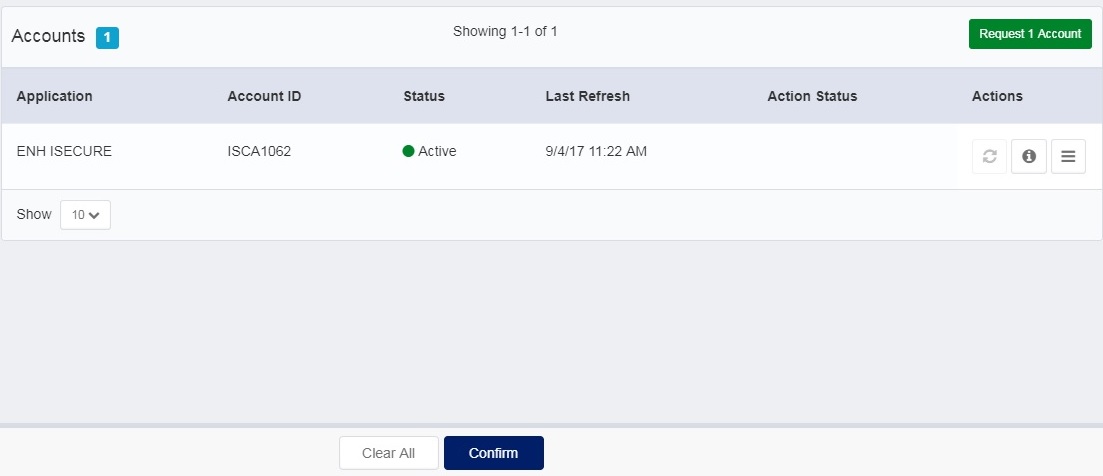
Confirm Account Request
Solution 2 :
You can get same results by configuring through Debug Pages.
Step 1: Go to Debug Page > Select object QuickLink from dropdown list. Choose Manage Accounts.
Step 2: Follow same Step 2 in Solution 1.
Step 3: Request Account option is available (Issue Resolved).